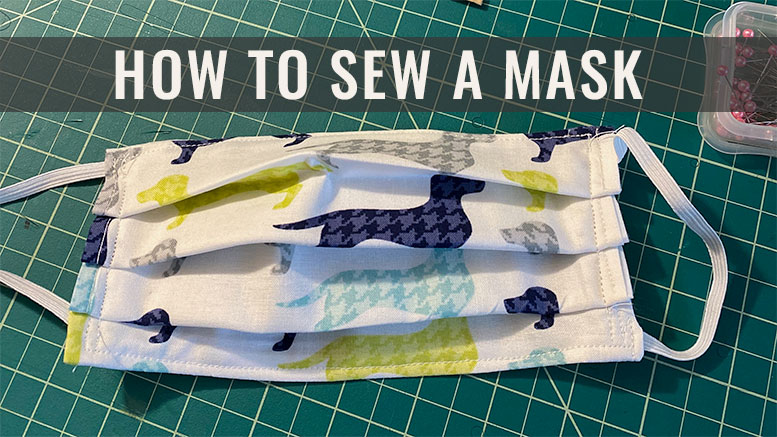
How to sew a mask: Milton Neighbor gives detailed instructions
For adult masks: two 9 x 7″ fabric pieces, two elastic pieces, 6-1/2″ each
For children’s masks: two 7 x ” fabric pieces, two elastic pieces, 6″ each
If you don’t have elastic, you can use four 15″ tie/ribbon pieces for adults or four 12′ pieces for children.
Directions:
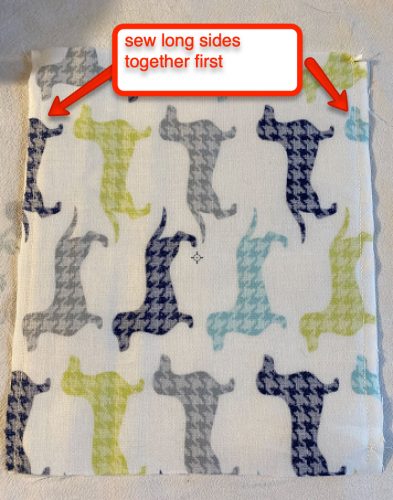
- With right sides facing in, put fabric pieces right side together and sew each of the long sides.

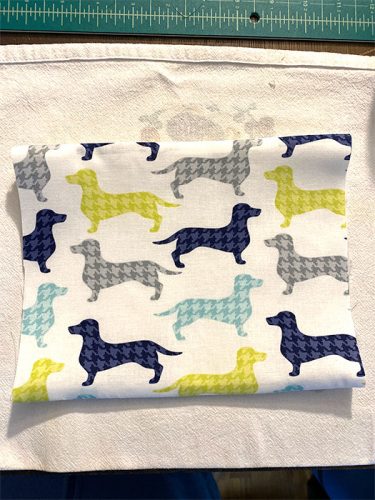
- Turn right side out and iron flat.

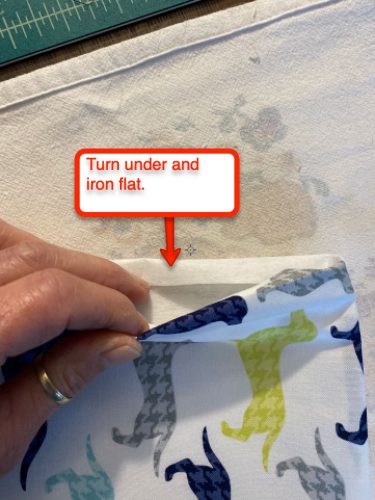
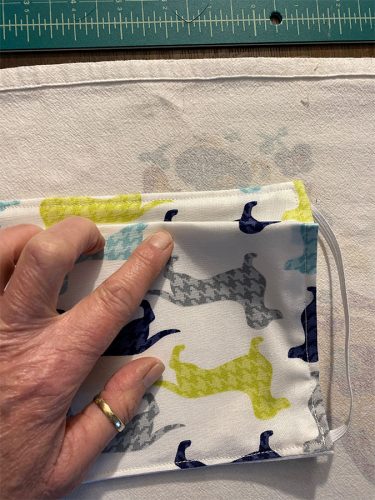
- At each unfinished short end, turn under approximately a half an inch and iron flat:
You are now ready to sew in elastic pieces or ties! 😃😃
- At the top of the short end insert your elastic or tie, and sew 3/4 of the way down.
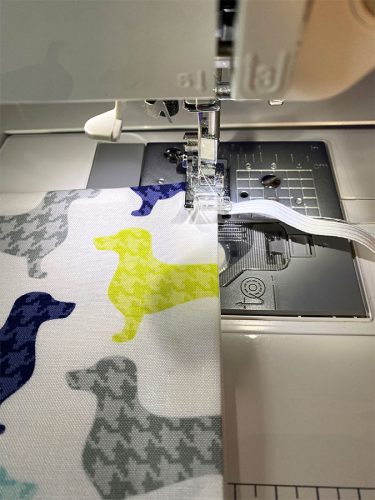
- At that point on the short side, insert the other end of your elastic or a second tie.

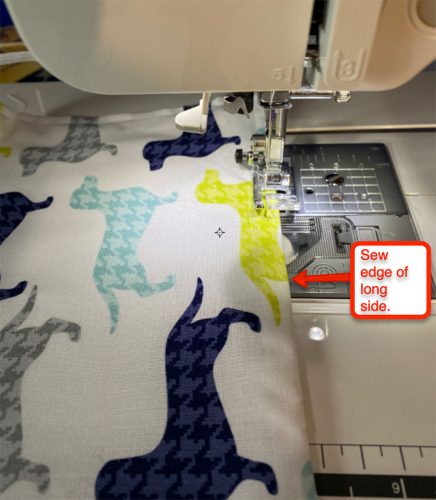
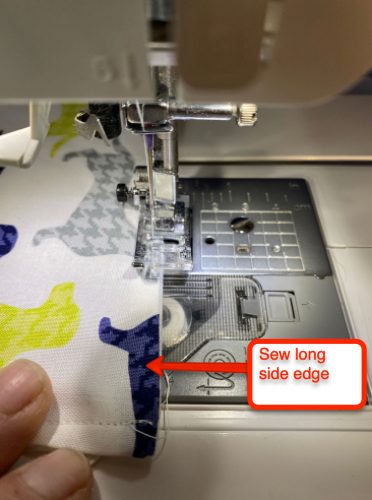
- Turn and sew 1/4″ finishing edge of long side.

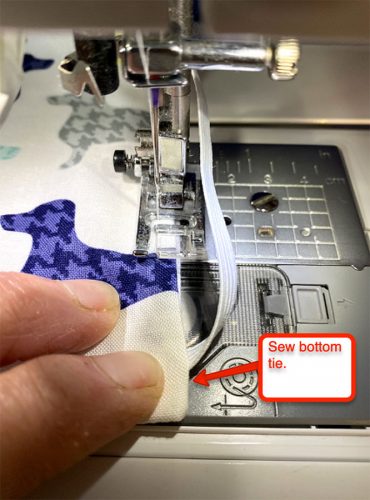
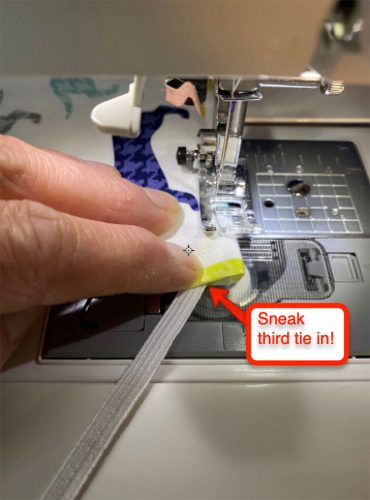
- When you have almost reached the corner of the long side, insert second elastic or third tie:
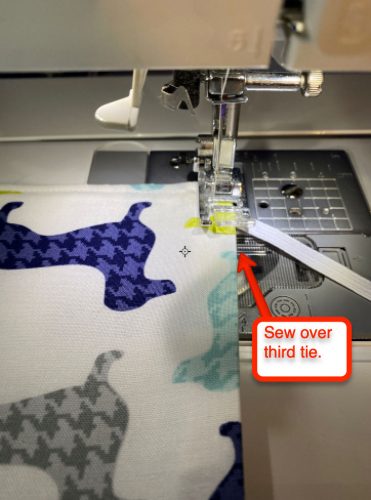
- Sew over third tie and to corner and turn securing elastic/tie:

- Repeat same as other short side sew 3/4 of the way down, insert other end of elastic or fourth tie, turn the corner and sew long side.

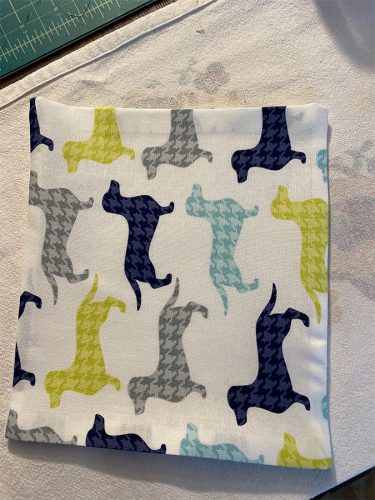
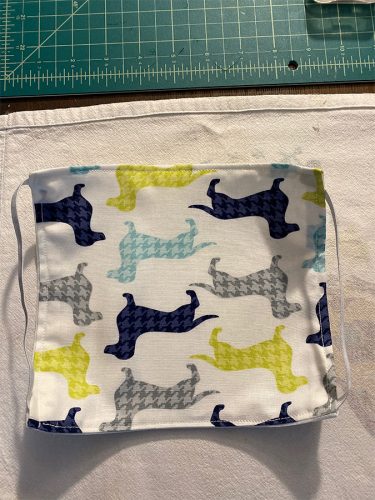
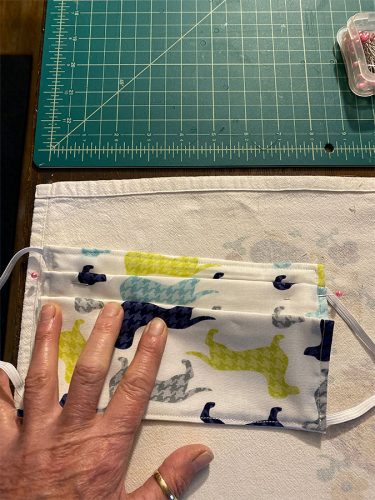
- You now have the base of your mask, with both elastics or ties sewn in. Here is what it looks like before pleats:
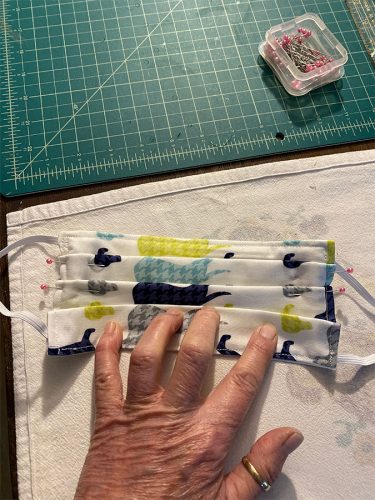
- Hand fold three approximately half inch pleats, iron down one at a time and pin:Pleat 1:
 Pleat 2:
 Pleat 3:
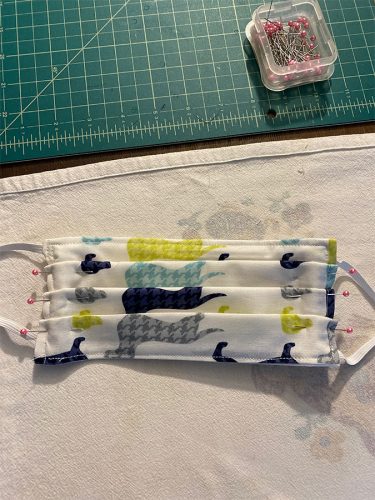
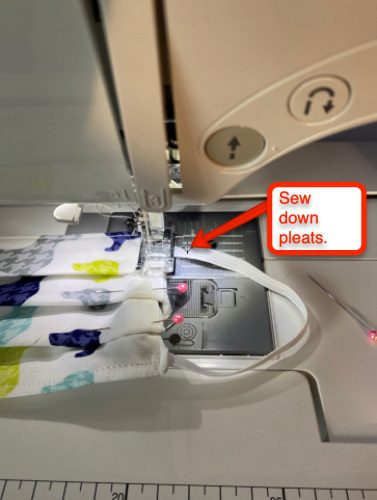
- Now all pleats are pinned:
- Sew down pleated edges with seam sewn closely to first. Repeat on other short pleated side, removing pins as you sew:

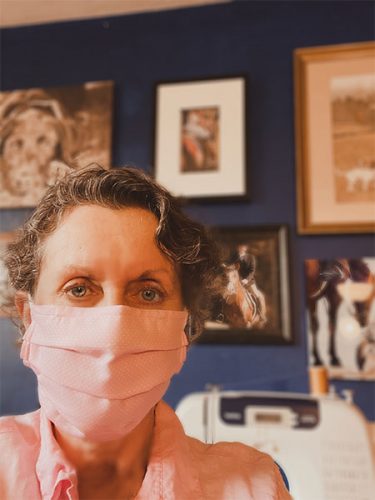
- VOILA! You are finished! Nicely done!


Thank you!
These instructions were created by Milton resident Ruth Baltopoulous, who has been tirelessly and voluntarily sewing masks and caps for the medical and Milton community.
See also:
How to sew a scrub cap (May 3, 2020)


Be the first to comment on "How to sew a mask: Milton Neighbor gives detailed instructions"